Page Summary
On this page we systematically walk through the process of getting started with JADE. We begin with creating an account / logging into sixclear.com and downloading / installing JADE. We then work through opening and running an example to get a feel for the runtime experience in JADE. Finally, we finish with creating an application from scratch and running it to begin appreciating the configuration and customization capabilities baked right into JADE.
Overview
At this point you’ve probably read somewhere that JADE helps you quickly build robust, feature-rich measurement & automation applications. Let’s get JADE installed and see it in action. We’ll start by walking through creating an account (if no already), logging in at sixclear.com, downloading JADE and a JADE Bundle, quickly running an example, and then building & running our own JADE application from scratch.
Create Account & Log In
If you haven’t already, visit create a Sixclear account:

Click the confirmation link sent via email and then login:

You’ll land on the Account page as shown below:

Download JADE (and a Bundle)
Click the MY JADE tab under login which shows the quickstart steps as shown below. Use step 1 to download JADE and step 2 to download the All Latest bundle.

Install JADE
Run the JADE installer with a name similar to jade.x.y.z.installer.exe.
When JADE finishes installing you should find a JADE icon on your desktop. We recommend right-clicking on it and choosing the option to Pin to Taskbar for quick access hereafter.
Launch & Activate JADE
Double-click the JADE icon shown above to launch JADE. If this is your first time launching this version of JADE, the JADE Activation window will display and you’ll be prompted for an activation code for your computer.

Copy the Computer ID and then visit the My JADE page under login at sixclear.com. Scroll down to the computers table and add a computer with your desired name and your Computer ID:

Your computer will now be available in the Licesnses section. Choose your computer name from the dropdown, select the (major) version of JADE you just installed, and click the GENERATE button to generate an activation code for your computer:

Click on the acvivation code to copy it, return to the JADE Activation screen to add your activate code:

Note: you can always return to the JADE Activation window by selecting Install >> Activate... in the menu.
You may now close the activation window and being using JADE. An empty Application Manager window will open:

Install JADE Bundle
Now let’s install the “All Latest” bundle we downloaded previously. This bundle contains all the plugins we’ll need for the moment. The easiest way to do this is to simply double-click the JADE Bundle icon:
After double-clicking on it, the Install Manager will open and begin installing the bundle:

Note: alternatively, we could have initiated the bundle installation by opening the Install Manager from the Install > Install Manager... menu option in Application Manager, and then using the File > Install Bundle... menu option in the Install Manager.
When the installation completes you’ll see a success dialog. If may indicate that you need to restart your computer if drivers were installed.

And upon closing it you’ll see the log color return to neutral indicating completion:

At this point, we have everything installed that we need to build and run applications in JADE!
Run An Example
Examples are a powerful way to both learn about features and start applications in JADE. Let’s start by saving a copy of the example named Acquire, Log, and Plot Sensor Data with VISA (which was installed with our “All Latest” bundle).
Note: In JADE, we don’t modify installed examples directly. Instead, we first make copies of the examples before editing or running them. This keeps the installed examples pristine and you can always return to them to make fresh copies. We can view installed examples, and make a copy, from the Install Manager or download them from the JADE Docs.
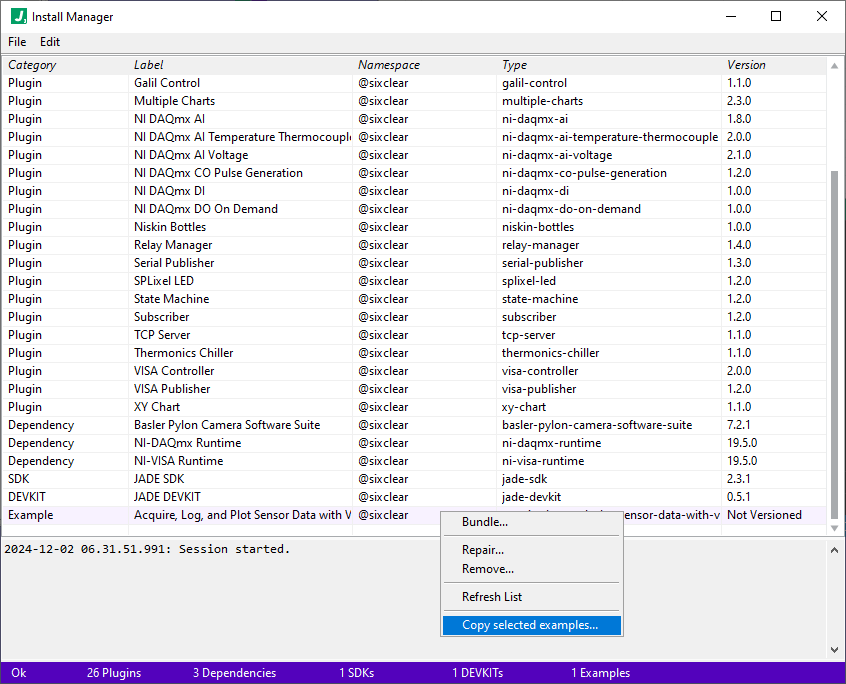
Open the Install Manager (if not already) and locate the example Acquire, Log, and Plot Sensor Data with VISA. Select it, right-click, and choose the option to Copy selected examples...
When prompted, save the example to your desired location. This will save a JADA file named acquire-log-and-plot-sensor-data-with-visa.jada. If you’re seeing the file on disk, you’ll see an icon like the following:
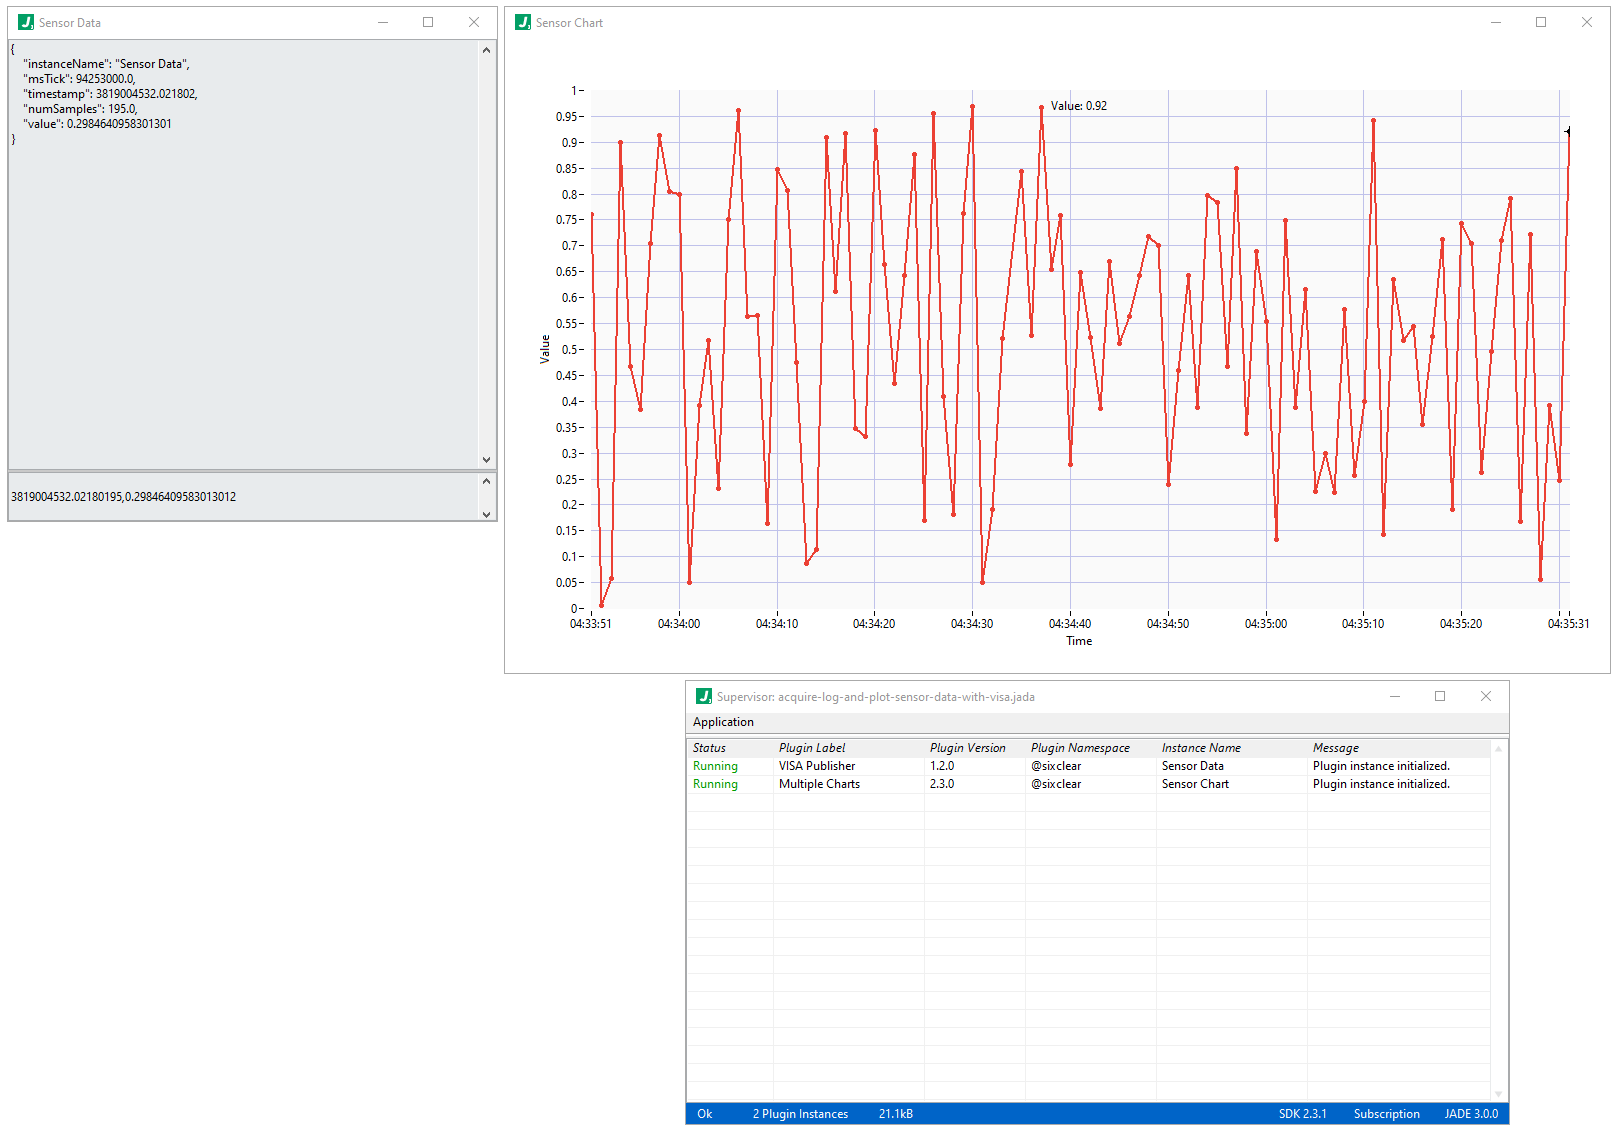
Next, open that JADA file by either double-clicking on it or using the File >> Open... menu in JADE and run it with the Application > Run Application menu option. You should then see 3 windows open where we have arranged them manually as seen below:
To explore the example in more detail, head over to the docs for this example.
Summary
If you’ve made it this far, congratulations! You’ve now installed and activated JADE, and even run an example. While plugins tend to have deep configuration, they also have deep documentation to help you along. And of course the deep plugin configuration is always there to save you from hours of writing, debugging, and maintaining loads of irreducible code to get the capabilities and features you need in your applications.